


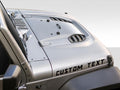

Yes, you can remove Jeep decals without damaging your paint. The key is heat and patience. A heat gun or hair dryer softens the adhesive so the vinyl lifts cleanly instead of tearing apart and leaving a sticky mess. Rush the process or go in cold, and you risk scratching the clear coat or leaving behind a ghost outline of the old decal. Go slow, keep the heat moving, and your paint will come out fine. This guide covers the exact tools you need, a clear step-by-step process, how to deal with stubborn adhesive residue, and how to know when a worn-out decal is telling you it is time for something fresh.
What Tools Do You Need to Remove Jeep Decals?
Having the right supplies on hand before you start makes the whole job faster and safer. Here is what to gather:
- Heat gun or hair dryer: A heat gun gives you more control and reaches temperature faster. A hair dryer on its highest setting works fine for smaller decals. Either will do the job.
- Plastic scraper or old credit card: Plastic will not scratch the clear coat the way a metal blade can. A stiff loyalty card or an automotive plastic pry tool both work well.
- Adhesive remover: Products like Goo Gone Automotive or 3M Adhesive Remover are designed for exactly this. Keep a bottle within reach.
- Isopropyl alcohol (70% or higher): Good for a final wipe-down after the adhesive remover. It evaporates clean and will not leave a film.
- Microfiber cloths: Use these for applying remover and wiping the surface. Paper towels can leave fine scratches.
- Detail spray or quick detailer (optional): A light mist after the clean-up step restores any dullness and protects the area.
- Clay bar kit (optional): If the panel has not been detailed in a while, a clay bar pass after the decal is off will leave the surface silky smooth and ready for a new decal to bond cleanly.
You do not need anything exotic. Most of these items are already in a basic car-care kit or available at any auto parts store for under $20 total.
How Do You Remove a Jeep Decal Step by Step?
Follow these steps in order and the decal will come off in one clean process without any panic moments.
Step 1: Wash and dry the panel
Start with a clean surface. Dirt and grit trapped under a plastic scraper can cause micro-scratches even if you are being careful. A quick rinse and dry takes two minutes and is worth it.
Step 2: Heat the edge of the decal
Hold the heat gun or hair dryer 2 to 3 inches from the decal surface. Move it slowly back and forth across one corner or edge for 20 to 30 seconds. You are not trying to cook the vinyl. You just want to soften the adhesive enough that the decal becomes pliable. On a cool day, it may take a little longer. On a hot summer day in the sun, the decal may already be halfway there.
Step 3: Lift the edge at a 45-degree angle
Use your fingernail or the corner of the plastic scraper to catch the heated edge and start peeling. Keep the pull angle at roughly 45 degrees. Too flat (pulling parallel to the surface) tends to leave adhesive behind. Too steep (pulling straight up) can cause the vinyl to tear into small pieces, making the job much longer. Slow and steady at 45 degrees is the sweet spot.
Step 4: Move the heat gun along as you pull
Work in sections. Heat a few inches, peel a few inches. Heat, peel. Keep the warm zone just ahead of where you are pulling. If the decal starts to feel stiff or you hear any cracking sound, stop pulling and apply more heat before continuing. Forcing a cold decal is how paint gets damaged.
Step 5: Remove adhesive residue
Once the vinyl is off, you will almost certainly see a sticky residue left on the paint. This is normal. Apply a small amount of Goo Gone Automotive or your chosen adhesive remover to a microfiber cloth and rub the residue in a circular motion with light pressure. Let the product sit for a minute if the residue is thick. It will lift without you having to scrub hard.
Step 6: Wipe clean with isopropyl alcohol
After the adhesive remover has done its work, wipe the area down with isopropyl alcohol on a fresh microfiber cloth. This step removes any oily residue left by the adhesive remover itself and preps the surface cleanly.
Step 7: Finish with detail spray or clay bar (optional)
A quick pass with detail spray restores the shine and leaves a light protective layer. If you plan to apply a new decal the same day, skip the wax-containing products and stick to isopropyl alcohol as your final prep step. A clean, bare, dry surface gives the new vinyl the best bond.
How Do You Remove Stubborn Decal Residue?
Some older decals, especially ones that have been baking in the sun for years, leave behind residue that basic adhesive remover will not budge on the first pass. A few approaches that work:
- Soak longer: Apply adhesive remover, lay a damp microfiber cloth over the area, and let it sit for 5 to 10 minutes before wiping. Dwell time does most of the work.
- Plastic eraser wheel: These drill-mounted rubber wheels are sold at auto parts stores specifically for adhesive and decal removal. They spin against the surface and peel residue away without touching the paint. They look intimidating but are safe when used correctly on a painted panel.
- Isopropyl alcohol, repeated passes: Sometimes several light passes with 90% isopropyl on a microfiber, letting the area dry between each pass, will gradually lift what one heavy application missed.
- Clay bar: A detailing clay bar pulled across the clean, lubricated surface picks up embedded adhesive particles and leaves the paint glass-smooth. This is the best finishing step if you want to apply a new decal with a perfect bond.
One thing to avoid: acetone or nail polish remover. These solvents are effective on adhesive but they can strip clear coat and leave a dull spot that requires professional correction. Stick to purpose-made automotive adhesive removers.
When Should You Replace a Decal Instead of Just Removing It?
Sometimes removal is just the first step in a refresh. Here are the signs that your old decal has run its course and it is time to put something new on:
- Fading and chalking: If the colors have gone dull, washed out, or chalky, no amount of cleaning will bring them back. That is UV degradation built into the vinyl itself.
- Peeling edges: Once the edges start lifting on their own, dirt and water get underneath and accelerate the separation. The decal is done.
- Recent repaint or color change: If your Jeep has a new paint job or you changed the body color, the old decal probably does not match anymore. Fresh paint is also the perfect clean canvas for new graphics.
- Bubbling: Bubbles under the vinyl usually mean the adhesive has failed in patches. The decal will not flatten back down permanently.
- You just want something different: That is reason enough. Removing an old decal and replacing it with something new is one of the cheapest and fastest ways to update the look of your Jeep.
After you pull off the old vinyl and clean the surface, the panel is prepped and ready. That is the perfect moment to put on something new. Browse the full lineup at Jeep Decal Store to find a replacement that fits your Jeep and your style. All decals are made in the USA from premium cast vinyl.
Frequently Asked Questions
Will a heat gun damage my Jeep's paint?
Not if you use it correctly. Keep the gun moving and maintain 2 to 3 inches of distance. You are targeting the adhesive layer, not the paint. Holding the gun stationary in one spot for an extended time can cause heat damage, so keep it moving at all times.
Can I use a razor blade to remove a Jeep decal?
It is not recommended on painted surfaces. Metal blades can slip and scratch the clear coat even when you are being careful. A plastic scraper or old credit card does the same job without the risk.
How long does it take to remove a Jeep decal?
A standard hood decal or door graphic takes 15 to 30 minutes for most people working carefully. A full-body wrap or large graphics set will take longer. Plan for extra time if the decal is old or if the adhesive residue is heavy.
Will Goo Gone damage car paint?
Goo Gone Automotive is formulated to be safe on car paint when used as directed. Regular Goo Gone (the household version) is also generally safe but the Automotive version is the better choice. Always wipe it off promptly and follow with an isopropyl alcohol wipe-down.
What if the decal tears into small pieces when I try to remove it?
This usually means the vinyl is old and brittle from UV exposure. Apply more heat to each small section before lifting. A plastic eraser wheel attachment on a drill can help clear the remaining fragments faster than picking them off by hand.
Can I apply a new decal right after removing the old one?
Yes, as long as the surface is clean and completely dry. Do your final wipe with isopropyl alcohol, let it dry for a few minutes, and the panel is ready. Avoid wax-based products in that final step since wax reduces adhesion for new vinyl.

The right tool for both removal prep and re-application. Felt edge protects paint while pushing residue clear.

Use for final wipe-down after adhesive remover. Lint-free and safe on all Jeep paint finishes.
Ready for Something New?
Once the old decal is off, the real fun starts. Shop every style for JL, JK, JT and more.
Browse All Decals →Made in the USA. Free shipping on orders over $35.
0 comments