


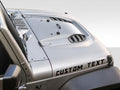

Side-hood lettering is the most personal decal you can put on a Jeep. It is the name you gave the thing, sitting right where the factory badge would be, and everyone who walks past reads it. That is exactly why it has to go on straight, at the same height, and in the same spot on both sides. A crooked name is the first thing people notice.
The good news is that a professional result has nothing to do with talent. It comes from masking tape, a tape measure, and a pencil. This guide walks through the way installers letter a hood: lay it out, measure it, hinge it, and then copy the measurements to the other side so the two match.
If you are installing a large hood graphic instead of lettering, our full hood decal installation guide covers that job in detail. This one is about names and words on the sides of the hood.
What You Need
- Your lettering. Leave it unrolled and flat for a few hours before the install, with something light on top, so it loses the shipping curl.
- Masking tape. Half-inch or one-inch painter's tape is perfect.
- A tape measure and a pencil with something to write on.
- A squeegee. A felt edge is kinder to the transfer tape and the paint.
- Scissors and a sharp utility knife or a pin for bubbles.
- Isopropyl alcohol (91% or higher) and a couple of clean microfiber cloths.
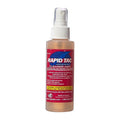
- Optional: an application fluid such as Rapid Tac if you prefer the wet method.
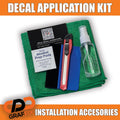
Lettering and the tools to install it


Before You Start: Clean It Like You Mean It
Vinyl adhesive needs bare clear coat. Wax, polish, and spray sealants all sit between the adhesive and the paint, and they are the number one reason lettering lifts at the edges a few weeks later.
- Wash the sides of the hood with car soap and water, rinse, and dry with a clean microfiber cloth.
- Wipe the area with isopropyl alcohol to strip any wax or sealant that the wash left behind.
- Wash and dry in straight lines rather than circles. If the cloth leaves a mark, a straight one is much harder to see and much easier to polish out than a swirl.
Work in the shade with the hood cool to the touch. A hood that has been sitting in the sun makes the adhesive grab instantly, which leaves no room for adjustment.
Step 1: Lay It Out With Tape
Hold the lettering against the side of the hood, still on its backing, and move it around until it looks right to you. There is no single correct spot. Most owners center the name in the flat area between the front edge and the cowl, and line it up with the body line below it.
When you like it, tape it down with a small piece of masking tape at each end. Now walk away. Look at it from ten feet back and from the front corner of the Jeep. This is the spot you will live with, so take your time and peel the tape up to adjust it as often as you need to.
Step 2: Measure From Fixed Points and Write It Down
This is the step that separates an installer from everyone else. Before you stick anything, record exactly where the lettering sits, measured from points that exist on both sides of the hood:
- Front: the front edge of the hood to the nearest letter.
- Rear: the rear edge of the hood at the cowl to the nearest letter.
- Height: the body line to the bottom of the lettering, measured at both ends of the word.
Pick reference points that are easy to read with a tape measure. A crisp body line or panel edge is better than a curved hood latch. If the two height measurements match, the lettering is parallel to the body line and it will look straight from every angle.
Write the numbers on a quick sketch of the hood. You need them for the second side.
Step 3: Hinge It and Apply the First Half
Run one long strip of masking tape vertically through the middle of the lettering, across the transfer tape and onto the hood on both sides. That strip is your hinge. It holds the decal exactly where you measured it while you work.
- Flip one half of the lettering up over the hinge.
- Peel the backing paper away from that half, back to the hinge. Peel at a low angle and go slowly. If a letter wants to stay on the backing, press it back down onto the transfer tape and try again.
- Cut the loose backing off with scissors close to the hinge.
- Hold the end of the transfer tape off the paint with a little tension so it does not wrinkle, and lay it down from the hinge outward.
- Squeegee over the transfer tape from the center out, using firm, overlapping strokes. Keep the transfer tape on while you squeegee so the edge never touches the bare vinyl or the paint.
Step 4: Finish the Other Half
Pull the hinge tape off, flip the other half up, and peel the remaining backing away. Keep a little tension on the end so it stays smooth, lay it down, and squeegee from the center out exactly like the first half. If the transfer tape wrinkles as you lay it down, lift it and pull it straight before it touches.
Step 5: Peel the Transfer Tape Slowly
Start at a top corner and peel the transfer tape back on itself, almost flat against the hood, rather than pulling it straight out. Go slowly and watch each letter as the tape passes over it.
If a letter starts to come up with the tape, stop, lay the tape back down, press that letter firmly with your thumb or the squeegee, and peel again. Thin script and small punctuation like periods and apostrophes are the usual troublemakers. Once the tape is off, press every letter down with your fingers, edges included.
Step 6: Deal With Any Bubbles
A small bubble under one letter is normal and easy to fix. Prick it at the edge with the tip of a sharp knife or a pin, then push the air out toward the hole with your thumb. The hole closes up and disappears once the vinyl lies flat. Do not try to peel the letter up to fix it, because cut letters stretch easily.
Step 7: Copy It to the Other Side
Now pull out your sketch. Repeat the layout on the other side of the hood using the same front, rear, and height measurements, and adjust until every number matches before you hinge it.
There is one catch that trips up almost everyone. The name reads left to right on both sides, so it runs the opposite direction relative to the Jeep. On one side the first letter is nearest the front edge of the hood, and on the other side it is the last letter. Measure from the front edge to whichever letter is closest to it, and the two sides will match even though the words run in opposite directions.
Before you peel any backing, stand at the front of the Jeep and look down both sides at once. If they match by eye and by tape measure, hinge it and repeat Steps 3 through 6.
After the Install
Give the adhesive at least 48 hours before you wash the Jeep, then hand wash with car soap and keep a pressure washer off the edges of the letters. If a letter lifts in the days after the install, our decal troubleshooting guide walks through the usual causes. For more on the materials and what goes wrong, see the most common Oracal 651 installation mistakes.
Still deciding what to put on the hood? Our guide to Jeep name decals covers placement, size, and color, and what Reddit says about custom hood lettering is worth a read before you choose a font.
Frequently Asked Questions
How do you apply vinyl lettering straight?
Use the hood's own lines, not your eye. Tape the decal in place, then measure from the top of the lettering down to the body line at both ends of the word. When the two numbers match, the lettering is parallel to the body line, and it will look straight from every angle.
How do you get the name in the same spot on both sides of the hood?
Measure the first side from fixed points that exist on both sides, such as the front edge of the hood, the rear edge at the cowl, and the body line, and write the numbers down. Because the word runs the other direction on the passenger side, the front-edge measurement goes to the first letter on one side and the last letter on the other.
Should I use the wet or dry method for hood lettering?
Either works. Dry is faster and the letters grab right away, so it rewards careful layout. Wet application with a fluid like Rapid Tac lets you slide the lettering into place, but you have to let it set up before you peel the transfer tape, or small letters can lift with the tape.
How do you get a bubble out from under a vinyl letter?
Prick the bubble at its edge with the tip of a sharp knife or a pin, then press the air out toward the hole with your thumb. The hole is too small to see once the vinyl lies flat.
How soon can I wash my Jeep after installing hood lettering?
Give the adhesive at least 48 hours before you wash the Jeep. After that, hand wash it with car soap, and keep a pressure washer off the edges of the letters.

0 comments