



Off-road lights are only as good as where they point. A roof bar aimed a little low lights your hood instead of the trail, and ditch lights aimed straight ahead pile onto the patch your headlights already cover. Fixing both takes a flat wall, a roll of masking tape, and one dark evening.
This is a guide to aim, not to buying. Everything below that comes from a manufacturer or a statute is linked, so you can check it yourself.
Every light has one job
Decide what each light is for before you loosen a bolt. The aim follows the job.
- Ditch lights mount at the bottom corners of the windshield and light the sides of the trail. KC HiLiTES describes the intent as enhancing peripheral vision, so it is easier to identify obstacles, animals, and other hazards.
- Bumper-mounted bars and driving lights add distance straight ahead, from a height that does not throw light back at you.
- Roof bars reach the farthest and cause the most glare, because the hood sits between the light and the trail.
- Fog lights sit low on purpose. KC's instructions say they work best when mounted low and aimed underneath the fog.
How to aim ditch lights
KC's ditch light guide lays out two schools of thought: kick the lights out to the sides with enough angle that they actually light the ditches, or aim them straight ahead for extra distance. It lists the trade-offs plainly. Aimed outward, you get better peripheral vision and less hood glare, with no added distance. Aimed straight ahead, you get distance, more hood glare, and more light reflected back at your eyes from dust, fog, snow, and rain.
For most trail driving, outward is the right call. Your headlights already cover the middle. KC adds that if you angle the lights outward, a combo beam or spread beam is the best pattern.
You will see exact figures quoted for this: a set number of degrees or a clock position. KC's guide gives none. The right angle depends on your hood, your bracket, and your beam pattern, so aim by what you see:
- Park somewhere dark and sit in the driver's seat with the ditch lights on.
- Look at the hood. If there is a bright patch on the paint, swing that pod outward or tip it down until the patch is gone.
- Look at the ground ahead. Each pod should pick up where the headlights stop, not land on top of them.
- Match the two sides, then tighten.
The 25-foot wall method
KC HiLiTES prints this procedure on its installation sheets. It aims auxiliary lights in relation to your headlights, so the headlights have to be aimed properly first.
- Park on level ground, about 25 feet from a flat surface such as a garage door, with the vehicle square to it.
- Turn on the low beams and mark the center of each beam on the wall with masking tape, one short piece for the vertical center and a long piece for the horizontal line. Do the same for the high beams.
- Fog lights: aim them so the top cutoff of the beam sits on or below the low beam marks. KC says they should be aimed parallel to the ground or lower.
- Driving lights: set the horizontal centers of the beams at the same level as the high beam marks. KC is specific that driving lights supplement your high beams and should only be used with them.
- Tighten everything, then check the marks again. Lights move when you torque the bolt.
For off-road-only lights, the same sheet gives no measurement at all. Because those lights are not road legal, KC says aiming them is entirely up to you, and notes that most people want the beam as far down the road as possible while others set them slightly off to the sides. Use the wall to level and match the left and right sides, then finish the job on a dark trail where you can see what the beam is actually hitting.
Roof light bars and hood glare
A roof bar sits above and behind the hood, so part of its beam lands on the paint. Glossy paint reflects that light straight back through the windshield. Your eyes adjust to the brightest thing in view, so a lit-up hood costs you distance, which is the one thing the bar was bought for.
Three fixes work in this order.
- Aim. Tilt the bar up until the bright patch leaves the hood. If you go too far, you are lighting treetops, so stop as soon as the hood goes dark.
- Position. KC's instructions call the bumper the ideal place for driving lights, mounted right under or on top of it, and warn that lights mounted too high will bounce right back at you. A light on the bumper also has no hood in front of it to light up.
- Surface. If the bar is staying on the roof and some light still reaches the hood, change what the light hits. A matte surface scatters light in every direction instead of reflecting it back in one bright patch.
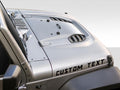
Automakers sell the third fix themselves. Ford sells a matte anti-glare hood graphic for the Bronco Sport and says it helps cut glare. A matte black blackout hood decal works on the same principle. It replaces the glossy paint in the middle of the hood with a flat, dark surface.
If you go that route, order Matte Black, not Black. Standard Black is a gloss finish, and gloss is the problem you are trying to remove. Our blackout hood decals are cut from ORACAL 651 and are offered in both.


Be realistic about what a decal does. It cuts the reflection from the part of the hood it covers. It doesn't fix a bar aimed at the hood, and it does nothing about light bouncing off dust in the air. Aim first. If you are putting one on yourself, our hood decal installation guide covers the process, and the full range is in hood graphics and decals.
When to leave the big lights off
More light is not always more vision. In dust, fog, snow, and rain, light hits the particles in the air and comes back at you. That is the same effect KC lists as a drawback of aiming lights straight ahead, and a roof bar aimed down the trail does exactly that from the highest point on the vehicle.
In those conditions, turn the roof bar off and run the low-mounted lights. This matters most in a group, where everyone behind the lead vehicle is driving in its dust. Our group trail ride rules cover spacing, which is the other half of seeing in a convoy. Being seen is a separate problem from seeing, and we cover that in reflective decals and night visibility.
What is legal on the road
Treat off-road lights as off-road only. KC's state-by-state guide puts it this way: in general, it is illegal to have off-road-only lights turned on while on the roadway, and a few states also require them to be completely covered.
Two of those states, checked against the statutes themselves:
- Pennsylvania. Title 75, Section 4303(f) says off-road lamps on the roof or roll bar must be covered with an opaque covering that prohibits any light from being emitted when the vehicle is on a highway or trafficway. Lighting one on a highway is a summary offense with a $100 fine.
- California. Vehicle Code Section 24411 says off-highway lamps must be wired independently of all other lighting circuits and, whenever the vehicle is on a highway, covered or hooded with an opaque hood or cover and turned off.
Every state writes this differently, and KC notes that it is up to you to make sure you are following your own state's rules. Read your state's vehicle code before you drive to the trailhead with uncovered lights. Wiring off-road lights to their own switch, separate from the headlights, is the safe default everywhere.
The short version
Give each light one job. Aim ditch lights outward until the hood goes dark. Use a wall 25 feet away and your headlight marks to set fog and driving lights. Tilt a roof bar up off the hood, and if light still lands there, put something matte under it. Turn the roof bar off in dust and fog, and cover everything that is not road legal before you get back on pavement.
Checked September 2026. This is general information, not legal advice. Lighting laws vary by state and change, so confirm your own state's requirements.
Frequently asked questions
How should ditch lights be aimed?
Angle them outward so they light the sides of the trail instead of the road straight ahead. KC HiLiTES notes that outward aim gives less hood glare, while aiming straight ahead gives more hood glare and more light reflected back at you from dust, fog, snow, and rain. Check from the driver's seat in the dark and adjust until no bright patch shows on the hood.
What are ditch lights used for?
They light the ditches and the sides of the trail. KC HiLiTES describes the goal as better peripheral vision, so obstacles, animals, and other hazards are easier to identify before they are in front of you.
How far from the wall should you park to aim lights?
About 25 feet, on level ground, with the vehicle square to a flat surface like a garage door. That is the distance KC HiLiTES gives in its installation instructions.
How do you aim an LED light bar?
For street-legal driving lights, KC HiLiTES says to set the horizontal centers of the beams level with your high beam marks on a wall 25 feet away. For an off-road-only bar, there is no fixed figure. Aim it so the beam reaches down the trail without lighting the hood or the treetops; use the wall to get it level, then fine-tune it on a dark trail.
How do I stop light bar glare on my hood?
Start with aim: tilt the bar up until the bright patch leaves the hood. If that sends the beam too high, move the light lower and farther forward, such as onto the bumper. If the bar has to stay on the roof, cover the glossy paint with a matte surface like a matte black hood decal, which scatters the light instead of reflecting it back at you. Order Matte Black, not standard Black, which is gloss.
Can you drive on the road with a light bar on?
Generally no. KC HiLiTES states that it is generally illegal to have off-road-only lights turned on while on the roadway, and a few states also require them to be covered. Pennsylvania and California both require an opaque cover over off-road lamps on a highway. Laws differ by state, so read your own state's vehicle code.
0 comments